It has been a shop kind of week for me. I’ve spent the past week diligently working on Lindsay’s cutting boards and milling lumber for others. So it’s time to continue my little essay on woodworking.
Once we have our rough lumber milled flat and smooth on both faces and a good edge it’s time to cut the boards into strips. This is done on the table saw, using a table saw fence as a guide. The objective is to keep the flat reference edge of the board against the fence. The fence is locked into place, so the space between the fence and the blade remains the same, ensuring equal sized strips.
Cutting these long strips with the grain is called ripping a board. The saw blade is raised just enough to clear the board, in order to minimize damage to one’s fingers should there be an accident. There is a hazard associated with table saws called kickback. When ripping, kickback can occur when the cut portion of the board behind the blade closes together and pinches the blade. Kick back can be pretty nasty. In addition to a board flying back towards you at high speed, your hand can get dragged across the spinning blade. My saw is missing the equipment to help prevent the kickback so I take extra care when cutting. With really long boards I have Lise putting wedges into the cut as it passes the edge of the table, just to make sure the board can’t pinch on the blade.


 Ripping boards into strips.
Once the strips are all cut it is on to the messy business of gluing. This is not my favorite part of the process. The wood glue is very strong and sets quickly. Ideally both surfaces to joined together will be completely covered with a layer of glue and then quickly pressed and clamped together. Hopefully without sliding out of place or bucking up. I’m using a gluing jig I built that allows me to glue up multiple strips, then quickly put a large amount of equal pressure on all of them. The jig is a lot easier than using a bunch of clamps as I used to do. Once the pressure is applied, glue is squeezed out along the seams in the strips. This is a good sign because it tells you that the glue is spread completely and evenly along the glued surfaces. It does make a mess that later has to be cleaned off by sanding or using the planer.
 Gluing jig.


Glue squeeze out.
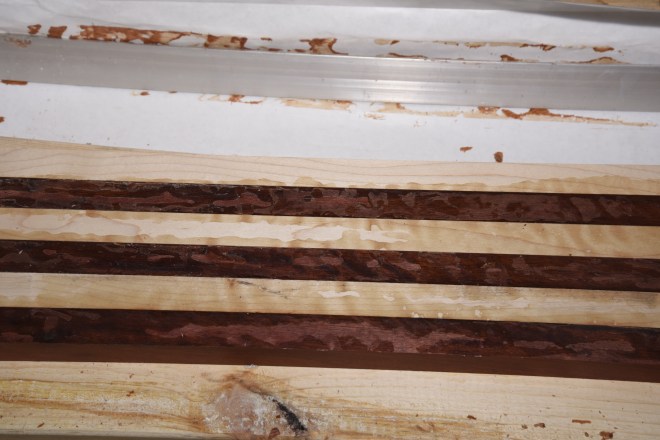 Dried glue that needs to cleaned off.
This cutting board isn’t going to be just a bunch of strips glued together. These six strips are about six inches wide in total and will be the center of a board approximately twelve inches wide. To make the center stand out I’m going to use a checker board pattern. To make a checker board pattern the glued board is crosscut into three pieces and the center piece flipped over. I do the crosscutting with a sled I built for the table saw. The piece I’m cutting sits in the sled and stays stationary while the sled slides across the table. When the sled is set up right it is easy to get a square cut and it’s a lot safer.


Crosscutting sled.
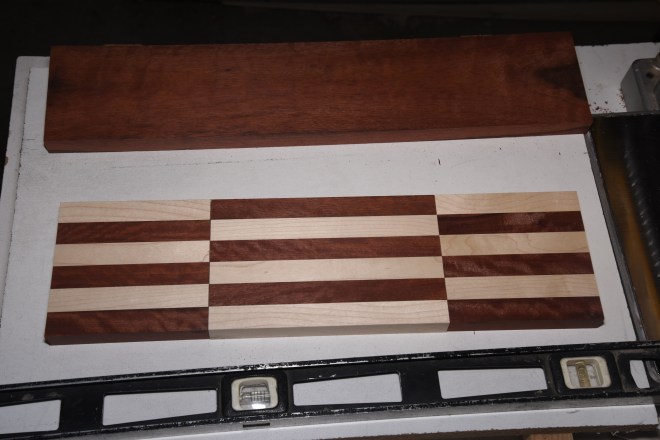 Center piece flipped over.
These three pieces have to be glued together but the process is a bit different than gluing strips together. Wood is essentially a bundle of fibers. When gluing on the long side of the fibers, as in gluing two strips side by side together, the glue penetrates the fibers on both surfaces and bonds them together. The glue is actually stronger than the wood. When a glues joint fails it is because the wood breaks, not the glue failing.
With these crosscut pieces, the ends that need to be joined together are called end grain. It’s the end of the wood fibers, not the sides of the fibers. With minimal surface area to join together the joint is weak. Think of gluing two straws together, end to end. To give the joint strength I use something called a spline joint. The two ends are slotted using the table saw, and a spline, a piece of wood the same thickness of the saw blade, is used to join them. The inside of the slots and the spline are side grain, allowing the glue to make a strong bond.
 Cutting a slot.


The slot and the spline.
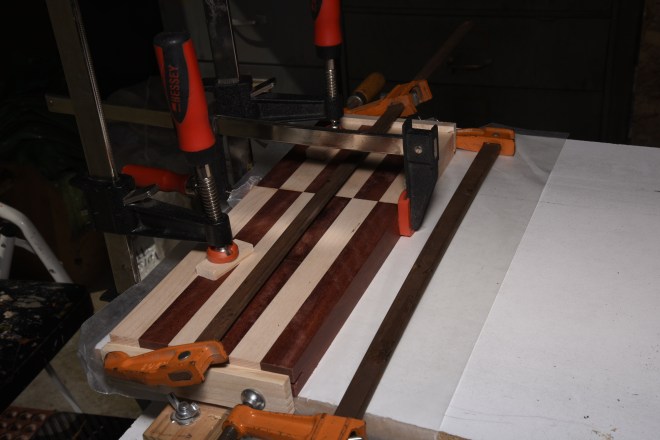 Gluing the pieces together.
With all three pieces are glued together I now have the “checker board” pattern that will be the center of the cutting board. The next steps are cutting and gluing the strips for the outside edges, cleaning everything up, rounding over edges with a router, maybe putting in juice grooves, sanding, and finishing. So, to be continued…..
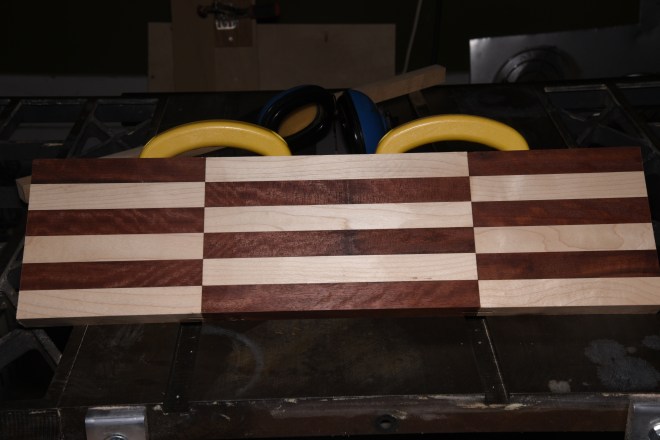 The center of the cutting board, approximately 22 inches long and 6 inches wide. More to come.
We have gotten in some outdoor play time too. Last Friday Lise and I went down to Pte. Mouillee to catch some shorebird migration. We got several new birds for the year, most notably a Baird’s sandpiper that we keyed out all by ourselves. No easy task I might add. Baird’s is one of the peep sandpipers where minor differences in the shape of a bill or the length of the wings differentiate species. It did help that we knew there were Baird’s in the area. Still, we felt pretty good about it. Lise is at 235 species for the year and I am at 233.
 Pte. Moo, downstream from the Fermi nuclear plant.
